
How You Plan an Eco-Educational Trip for Families and Teachers
You can turn a simple day out into a trip that teaches, excites, and leaves a lighter footprint. A well-planned eco-educational trip gives you and the children in your care a chance to learn from nature, local people, and real places, whether that means a nature centre, a working farm, a wildlife site, a national park, or a community-led experience.
You do not need a huge budget or a faraway destination to make it meaningful. If you are planning something further afield, eco-friendly travel spots in France are a useful place to start, but the same low-impact ideas work just as well closer to home. In this guide, you'll see how to choose the right destination, keep costs sensible, and build a trip that feels fun for families and useful for teachers.
What makes a trip truly eco-educational?
A trip becomes eco-educational when it does more than entertain. It helps you and the children connect what they see with how they behave, so the day has purpose as well as enjoyment.
The best trips teach respect for nature in practical ways. They also give you a clear chance to model low-impact choices, such as travelling sensibly, carrying reusable items, staying on paths, and supporting local businesses instead of big chains.
Learning, nature, and responsibility all in one trip
An eco-educational trip works best when learning, nature, and responsibility all support each other. You are not just looking at a woodland, shoreline, farm, or reserve. You are helping children understand how that place functions, why it matters, and how their choices affect it.
That means the trip should have a clear learning theme, such as habitats, food systems, wildlife protection, or waste reduction. It should also include practical habits that match the lesson, like using public transport where possible, packing refillable bottles, avoiding single-use packaging, and choosing activities that do not disturb animals.
When you spend money locally, you also teach an important lesson. A family-run cafe, a guide service, or a farm shop shows children that travel can support the people who care for a place every day. In eco-tourism, that link between people and place is part of the lesson itself.
A simple way to test your plan is to ask three questions:
- What will you learn here?
- How will you avoid harm?
- Who in the local area benefits from your visit?
If the trip teaches care, not just facts, it has started to do the right job.
This is where nature-based learning becomes powerful. Research on outdoor learning shows that hands-on experiences help children understand ideas more clearly than classroom discussion alone, especially when the activity is linked to real places and living systems. You can read more in this review of nature-based learning for primary-aged children.
Why hands-on experiences work so well
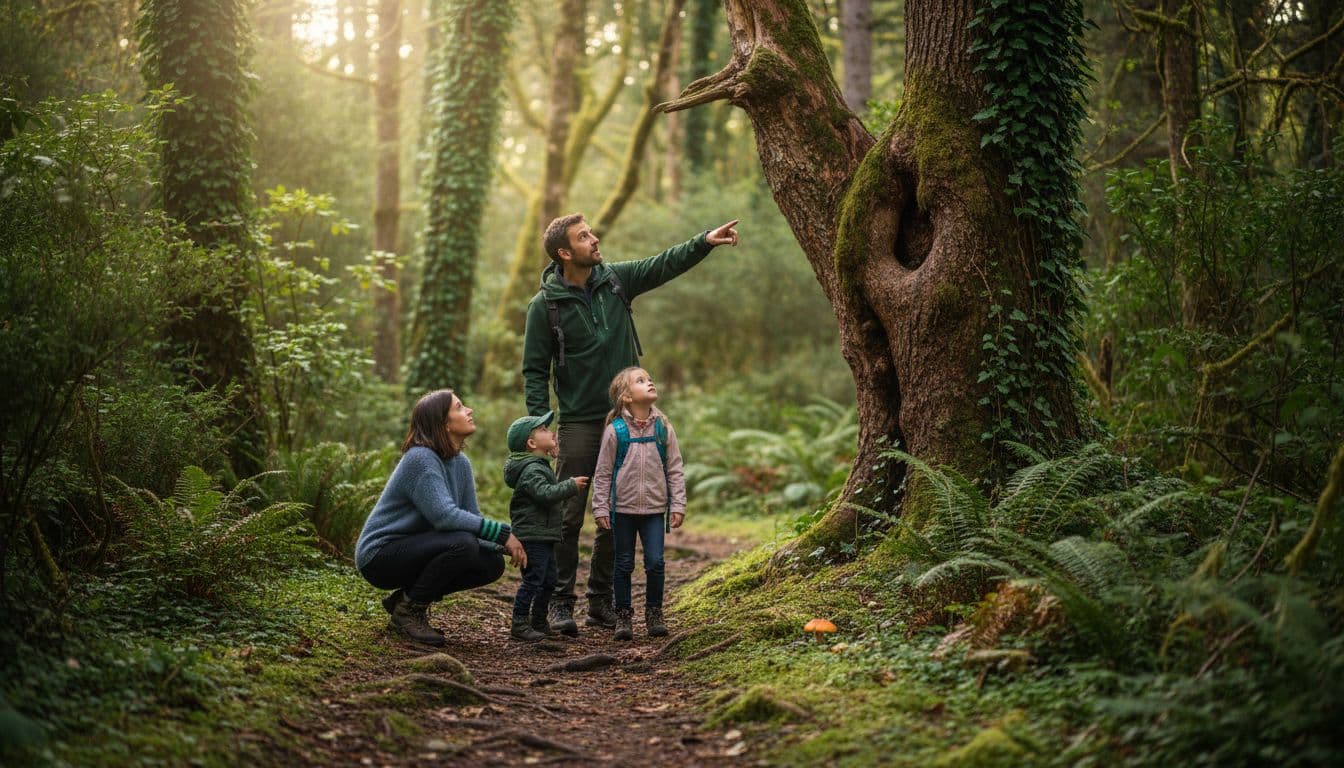
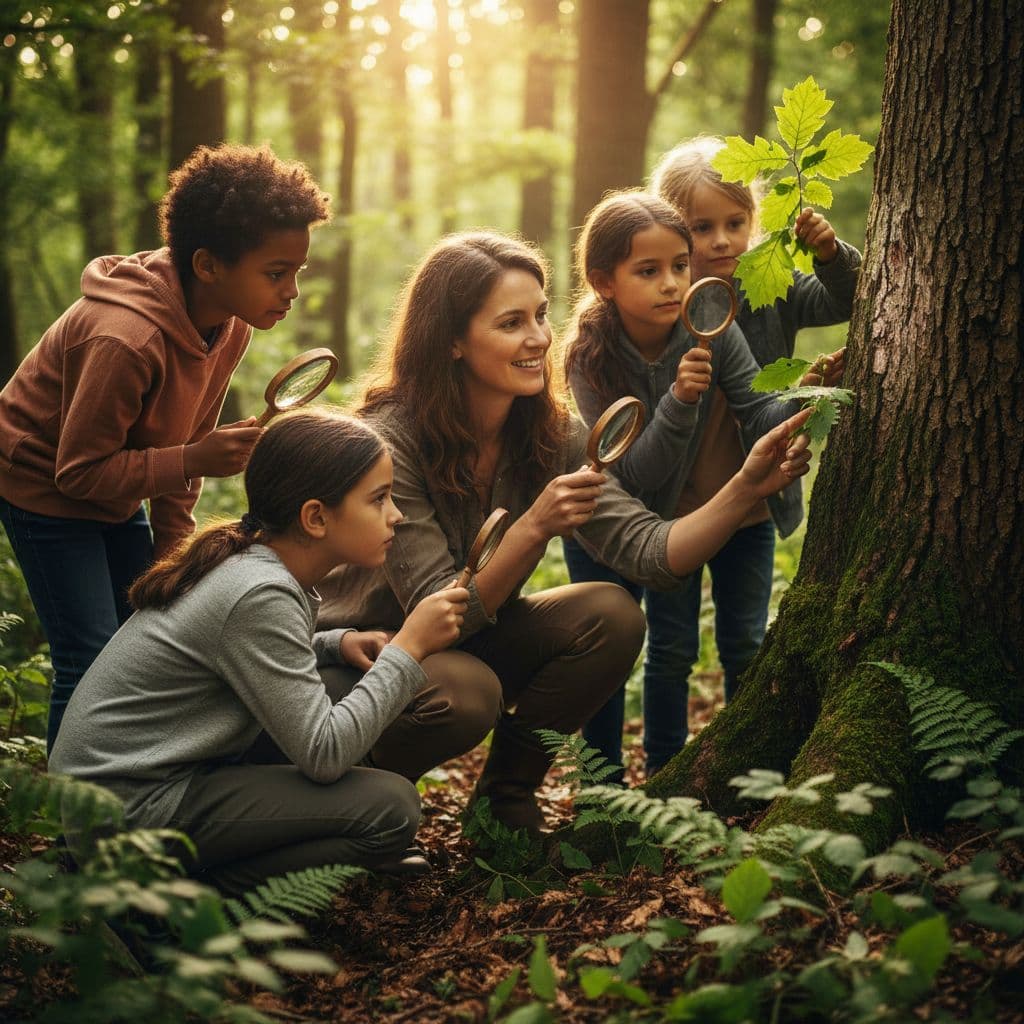
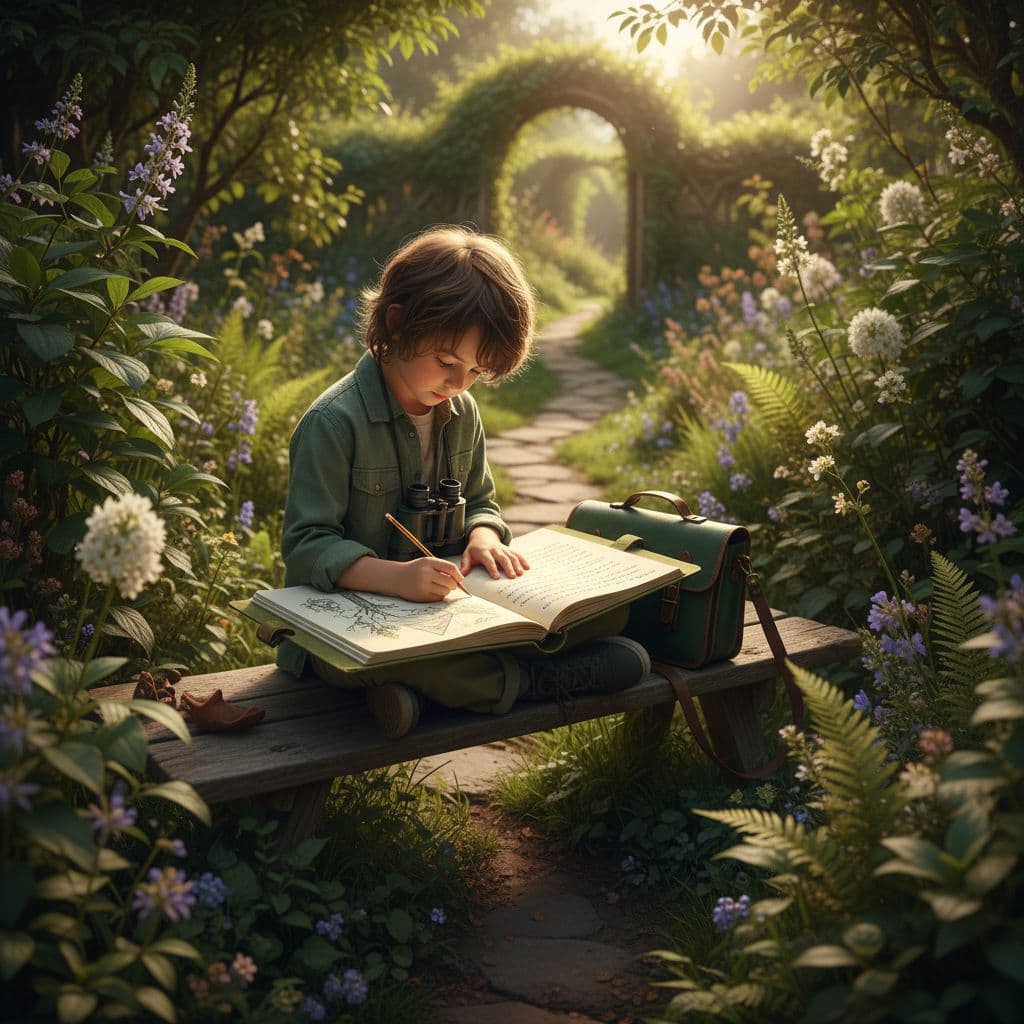
Children remember what they do. That is why guided walks, farm visits, beach clean-ups, wildlife watching, and simple field notes make such a strong impact. These activities turn abstract ideas into something they can see, touch, and describe in their own words.
A guided walk helps them notice layers of a habitat, from soil to trees to birds above. A beach clean-up teaches that litter is not just untidy, it can also harm animals and spoil shared spaces. Meanwhile, wildlife watching teaches patience and respect, because observing from a distance is part of responsible behaviour.
You do not need complicated materials to make this work. A notebook, pencil, magnifier, and reusable bag can be enough. Even a short task, such as counting different leaves or sketching signs of animal activity, keeps the trip active and focused.
Here are a few hands-on ideas that fit well on family and school trips:
- Field notes: Ask children to write or draw one thing they notice at each stop.
- Observation games: Spot birds, insects, shells, or plant shapes without touching them.
- Clean-up tasks: Collect litter in a set area and sort it afterwards.
- Farm learning: Watch how food is grown, fed, or harvested, then talk about waste and seasonality.
The best part is that these experiences build memory through action. As a result, the lesson stays with children long after the day ends. Outdoor education works best when it feels active, not passive, and that is exactly what makes eco-learning stick.
For more on how nature-rich experiences support learning and development, see the evidence on early childhood environmental education.
Choose a goal that matches your group
The best eco-educational trips feel clear from the start. When you choose one goal that fits your group, you keep the day focused, calm, and much easier to enjoy.
That goal might be wildlife spotting, habitat study, local food, or sustainability in action. A tight plan helps children know what they are looking for, while you avoid the chaos of trying to cover too much at once.
Pick one main topic to build around
Start with a single theme that the whole trip can support. Forests, marine life, pollinators, sustainable farming, and protected landscapes all work well because they give you a strong thread to follow.
A forest trip can focus on layers of habitat, tree health, and signs of animal life. A coastal visit can explore tide patterns, seabirds, and plastic pollution. If you choose a farm, you can look at food systems, soil care, and seasonal growing.
One strong theme keeps the day simple and memorable. It also makes your talking points sharper, which is helpful when you have lively children, mixed ages, or a short visit with plenty to pack in.
A good theme gives every stop a purpose. Instead of drifting from one activity to another, you can connect each part of the trip back to the same idea, and that helps the learning stick.
If you want a quick planning test, ask yourself whether the outing could be described in one sentence. If it cannot, the theme is probably too broad.
For younger children, simple structure works best. The Natural Start Alliance suggests matching field trips to the age group and keeping activities tied to the children's development level, which is exactly why one clear theme helps so much.
Match the trip to age and ability
Once you know the theme, shape the trip around the people going. A six-year-old, a teenager, and an adult helper will not need the same pace, distance, or task.
For younger children, keep walks short, use obvious signs to notice, and build in time to rest, look, and ask questions. Older children can handle longer routes, more detailed observation, and simple recording tasks such as sketching, comparing, or mapping.
Mixed-age family trips need a bit of balance. Give younger children jobs they can do easily, such as spotting colours, counting birds, or finding leaf shapes, while older children handle note-taking, route-finding, or group questions.
Classroom groups need the same care. You may want a main activity for everyone, then small follow-up tasks that suit different needs, so no one feels lost or bored.
A few practical adjustments make a big difference:
- Distance: Keep walks short for younger groups, and plan regular pauses.
- Pace: Build in slow sections for observation, not just movement.
- Tasks: Offer choices, such as drawing, counting, listening, or sorting.
- Support: Pair children up so they can help each other along the way.
If the pace is too fast, the lesson gets lost. If it suits the group, the place opens up.
Clear routines also help. The U.S. National Park Service shares useful field trip planning tips that reinforce advance preparation, clear learning goals, and practical planning, all of which matter even more when your group has mixed ages and abilities.
Link the trip to school subjects
A good eco-trip does not need to feel formal to be useful in class. In fact, it works better when the subject links feel natural and easy to spot.
Science fits almost anywhere. You can study habitats, life cycles, weather, food chains, or human impact. Geography comes in through maps, land use, water flow, and how people shape a place over time.
History can appear in farming traditions, old paths, heritage landscapes, or how a community has changed its land. Citizenship fits when you talk about shared spaces, fair access, caring for wildlife, and why local choices matter.
Art adds another layer. Children can sketch textures, build colour studies, photograph patterns, or create simple nature journals. That keeps the trip creative and helps quieter pupils take part in their own way.
To keep the outing useful, link the theme to one or two clear outcomes before you go. For example, you might want children to identify three signs of habitat health, explain one way local people protect the site, or record one thing they noticed that connects to class work.
The key is to keep the learning light on the surface and solid underneath. When the trip feels like an adventure but still backs up school goals, you get the best of both worlds.
Pick a destination that teaches without harming nature
The best eco-educational destinations do two jobs at once. They give you real learning value, and they protect the place you came to see. That means you should look beyond pretty views and ask what the site teaches, how it manages visitors, and whether your group can leave it as you found it.
This matters even more when you travel with children or classes. A good destination keeps them curious, active, and engaged, while a poor one turns the day into a rush through crowds and noise. Choose well, and the place becomes part of the lesson.
Look for places with strong learning value
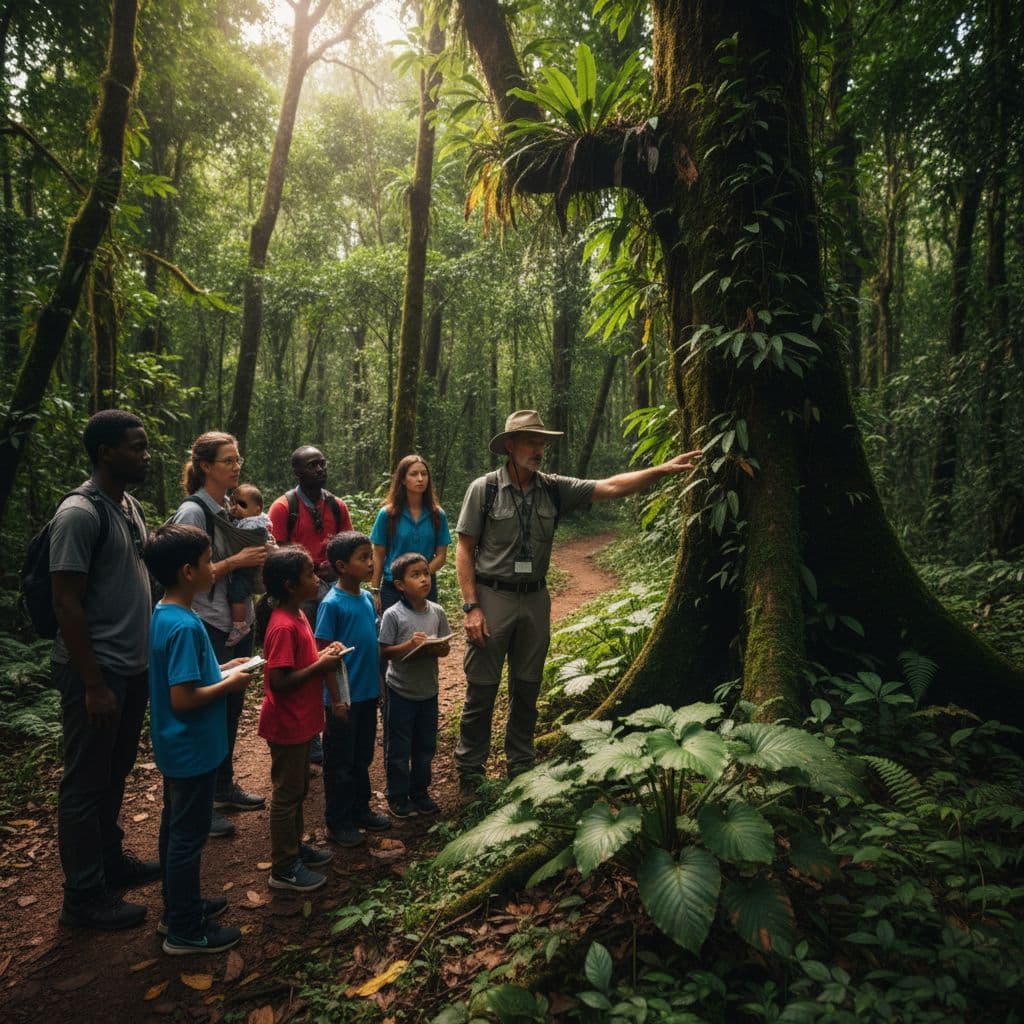
An educational destination should help you understand the place, not just pass through it. Strong options often offer guided interpretation, ranger talks, activity trails, local experts, or hands-on workshops that fit different age groups.
You can spot a good match by checking whether the site offers:
- Guided walks or ranger-led talks that explain habitats, wildlife, or conservation work
- Child-friendly routes with short distances, clear paths, and plenty of stopping points
- Workshops or field sessions where children can observe, record, or ask questions
- Conservation projects that show how the site protects wildlife or restores land
- Local guides and educators who know the area well and can tailor the visit
A site with strong learning value also gives you something to build on later. For example, a nature reserve can link to science, geography, and citizenship, while a working farm can open up lessons about food, soil, and seasons. Mass Audubon's field trips are a good example of how a place can combine class-style learning with real habitat visits.
If you are planning a school or family outing, choose a place that has a clear theme. A wetland, woodland, coastal path, or community garden each tells a different story, and that story should be easy to follow. The best places turn every stop into part of the lesson.
Choose low-impact travel options
Your travel choice shapes the whole experience. Shorter journeys, public transport where possible, and smaller group sizes all help reduce pressure on fragile sites and keep the day calmer.
Season timing matters too. Travelling off-peak often means fewer crowds, less noise, and more space for children to notice what is around them. It also makes supervision easier, which helps teachers and parents stay relaxed.
A well-timed visit can change the feel of the day. Instead of queueing and hurrying, you get room to look, listen, and ask questions. Children usually settle better when the site feels open and unhurried.
When you are booking, keep these points in mind:
- Pick the quietest time of day or year you can manage.
- Check whether the site can handle your group without crowding the paths.
- Use coaches, trains, lifts, or shared cars where practical.
- Avoid oversized groups if the destination is small or sensitive.
Off-peak visits often feel better for children, and they put less strain on the place you are studying.
If you want a model for this kind of planning, many U.S. nature sites now publish simple booking and timing guidance for school groups. The U.S. National Park Service also shares field trip planning tips that show how advance preparation keeps visits smoother and more purposeful.
Support places that give back to local people
Eco-education works best when the benefits stay close to the destination. Choose businesses that employ local guides, serve local food, and respect local culture, because that gives your visit more value than a standard day out.
This is where ethical travel becomes real. When you book a family-run café, a local guide, or a community-led attraction, you help money stay in the area. You also give children a useful lesson, travel should support people as well as places.
Look for signs that the destination shares its value fairly:
- Local guiding that brings in people who know the land and its stories
- Local suppliers for meals, snacks, and small purchases
- Respect for culture in the way activities are run and explained
- Community projects that involve residents in conservation or education
- Fair pricing that does not exploit families or small providers
This approach fits the wider ecotourism idea very well, responsible travel, nature care, and support for local communities all belong together. Organisations such as WWF's locally led conservation work show why people and nature need to be treated as connected, not separate.
When you choose a destination that teaches without harming nature, you create a trip with real value. The children learn more, the day feels richer, and the place keeps its character for the next visitors too. What part of this eco-educational idea would you try first?
Build a simple itinerary that keeps everyone engaged
A strong eco-educational day works best when it feels clear, calm, and varied. If you pack in too much, people tire quickly and stop noticing the place around them. If you keep the flow simple, you give everyone room to learn, ask, and enjoy the day.
A good itinerary does not need to be strict. It just needs a rhythm that supports the group, the site, and the learning goal. That usually means planning ahead, keeping each stop purposeful, and leaving space for the unexpected.
Use a before, during, and after structure
The easiest way to build a useful itinerary is to split it into three parts. Before the trip, prepare the group so they know where they are going, what they will look for, and how they should behave. That might mean a short talk, a simple worksheet, or a list of questions to think about on the journey.
During the visit, keep the plan light but clear. Start with a welcome and a reminder of the main theme, then move through a few short activities that link directly to what you want them to notice. A site visit works better when everyone knows the purpose from the start, rather than wandering from one point to another.
After everyone gets home, extend the learning while it is still fresh. Ask children to draw what they saw, write a few sentences, sort photos, or compare notes in class or at the kitchen table. That follow-up turns a nice day out into something with lasting value.
A simple structure like this helps you stay organised without making the trip feel stiff. It also gives teachers and parents a clear way to support the learning at every stage.
If you want a strong planning model, many outdoor education guides recommend a short, practical format with clear roles, safety checks, and a reflection point at the end. The Birds, Cornell Lab outdoor teaching tips are a useful reference for keeping outdoor learning focused and manageable.
Plan activities that suit different attention spans
You will keep more people involved if the itinerary changes pace a few times. Children, especially, need a mix of movement, stillness, and conversation. A long stretch of listening can lose them, while too much rushing means they miss the detail that makes nature learning so rich.
Build in movement breaks between activities. A short walk, a pause to stretch, or a quick nature hunt resets attention and gives the group fresh energy. Then follow that with a quieter moment, such as birdwatching, looking for plant shapes, or sitting still to listen to sounds around them.
It also helps to vary the task type. Some children like talking through ideas, while others prefer drawing or writing. You can meet both needs by mixing questions, sketching, and group discussion in the same visit.
A varied plan might look like this:
- Short arrival chat to set the theme and ground rules
- Walking observation time to notice plants, insects, or signs of habitat use
- Quiet sketching stop so children can slow down and focus
- Group discussion to share what stood out
- Movement break before the next activity or journey home
That kind of rotation keeps the day fresh. It also helps you spot who is still engaged and who may need a different kind of prompt.
Leave room for surprise and discovery
The best eco-learning moments are often the ones you did not plan. A sudden change in weather, a bird call overhead, a patch of wildflowers, or a local story from a guide can become the memory people carry home. If your itinerary is too tight, you miss those moments.
So leave gaps on purpose. A ten-minute pause between activities can be enough for children to ask questions, look more closely, or follow an interesting clue. Those pauses often lead to the best conversations because they are not forced.
You can also build flexibility into your questions. Instead of preparing only fixed tasks, ask the group what they have noticed that was not on the list. That simple move gives everyone permission to be curious and rewards careful observation.
The most valuable part of an eco-educational trip is often the detail you did not expect to find.
Real-world eco-learning works like that all the time. A class might go to study trees and end up discussing insects, weather, or a local conservation effort. That wider attention helps the day feel alive, not scripted.
When you keep the structure simple, the group stays settled and the place gets the attention it deserves. Then the trip becomes more than a schedule, it becomes a shared experience that teaches people to look closely and care more. What part of this eco-educational idea would you try first?
Pack the right kit and teach greener habits along the way
A well-packed bag makes the whole day smoother. It also gives you an easy way to show children that eco-friendly habits are practical, not complicated.
The aim is simple, carry what you need, avoid waste, and model care for the place you are visiting. When you do that well, the trip feels calmer, cleaner, and more meaningful.
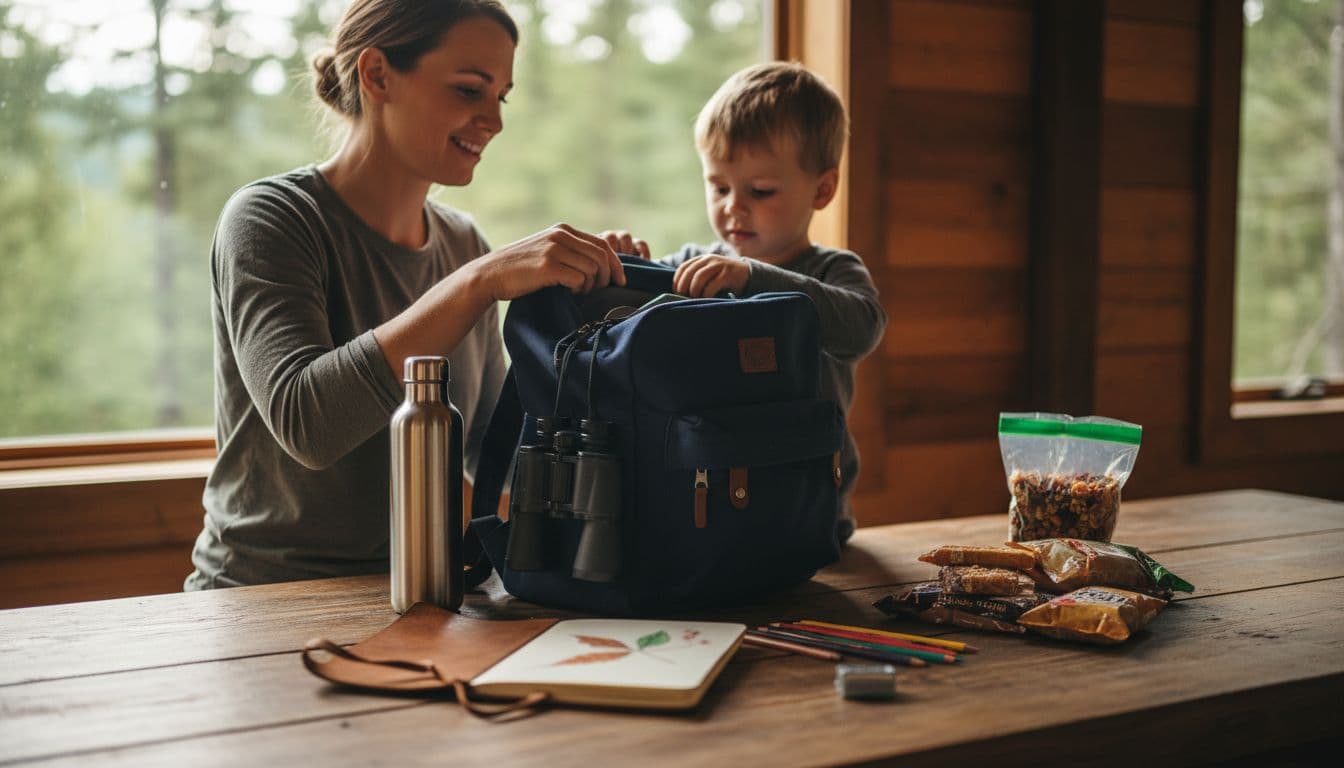
What to pack for comfort and learning
Start with clothing that keeps you comfortable in changing weather. Layers work best, because you can add or remove them as the day warms up or cools down. A light waterproof, a jumper, and sturdy shoes can save the day when conditions shift.
Then add the items that help children notice more. A field journal, pencils, and a small clipboard make it easy to sketch, write, and record what they see. Binoculars and a magnifier are useful too, because they turn a quick look into real observation.
A simple packing list helps keep everyone on track:
- Reusable water bottles for easy drinking without single-use plastic
- Healthy snacks in containers, such as fruit, nuts, or sandwiches
- Sun protection like hats, sunglasses, and sunscreen
- Basic first aid items such as plasters, wipes, and any prescribed medicine
- Field journals and pencils for notes, drawings, and questions
- Spare layers in case the weather changes
- Reusable bags for litter, muddy clothes, or collected materials
Pack for comfort first, then add learning tools. If children feel too hot, cold, wet, or hungry, they stop noticing the trip.
You can also keep the kit light by choosing items that do more than one job. A reusable lunch box, for example, cuts waste and keeps food tidy. For a useful packing checklist, this family field trip guide gives a solid starting point.
How to model low-waste behaviour
Children copy what they see, so your own habits matter more than your speech. Use a reusable bottle, bring containers for food, and keep napkins, cutlery, and wrappers to a minimum. When children see adults doing this, it feels normal and easy to follow.
Sorting waste should be part of the day, not an afterthought. If the site has recycling or rubbish bins, show children how to use them. If it does not, take everything home and explain why that matters. A clear rule helps: if you bring it in, you take it out.
Food choices can also teach a simple lesson. Choose snacks with less packaging, share portions that avoid waste, and buy local food where possible. That supports the place you are visiting and shows children that every small choice has a footprint.
Try giving children a job during the trip, such as:
- Carrying their own bottle and lunch box.
- Checking for litter before you leave each stop.
- Helping sort scraps into the right bag at the end of the day.
These habits are easy to understand because they are concrete. Children do not need a lecture when they can see the difference in front of them.
Teach respect for wildlife and habitats
Nature trips should teach children how to watch without harming. Keep the rules short and clear. Stay on paths, keep noise low, and leave animals and plants where they are.
Distance matters. If an animal changes its behaviour because you are too close, you are too close. That applies to birds, insects, and larger wildlife alike. Photography should also stay respectful, so avoid chasing animals for a better shot or stepping into fragile areas for a picture.
You can frame these rules in child-friendly language:
- Look, don't touch unless a guide says it is safe and appropriate.
- Stay back so animals can feed, rest, and move naturally.
- Use quiet voices so you do not scare wildlife away.
- Leave flowers, nests, shells, and insects alone because they are part of the habitat.
This is also a good moment to explain that protecting living things is part of the lesson. Children learn more when they understand that nature is not a backdrop, it is the subject. A site visit becomes much more powerful when they see that their behaviour affects what they are studying.
If you want to reinforce that message later, ask children what they noticed without touching or disturbing anything. That helps them connect curiosity with care, which is exactly the habit you want them to carry into future trips.
Keep the kit simple, then build good habits
You do not need a mountain of gear to plan a strong eco-educational outing. A sensible bag, reusable items, and a few clear rules are enough to make the day work well. More importantly, they show children that respect for nature begins with ordinary choices.
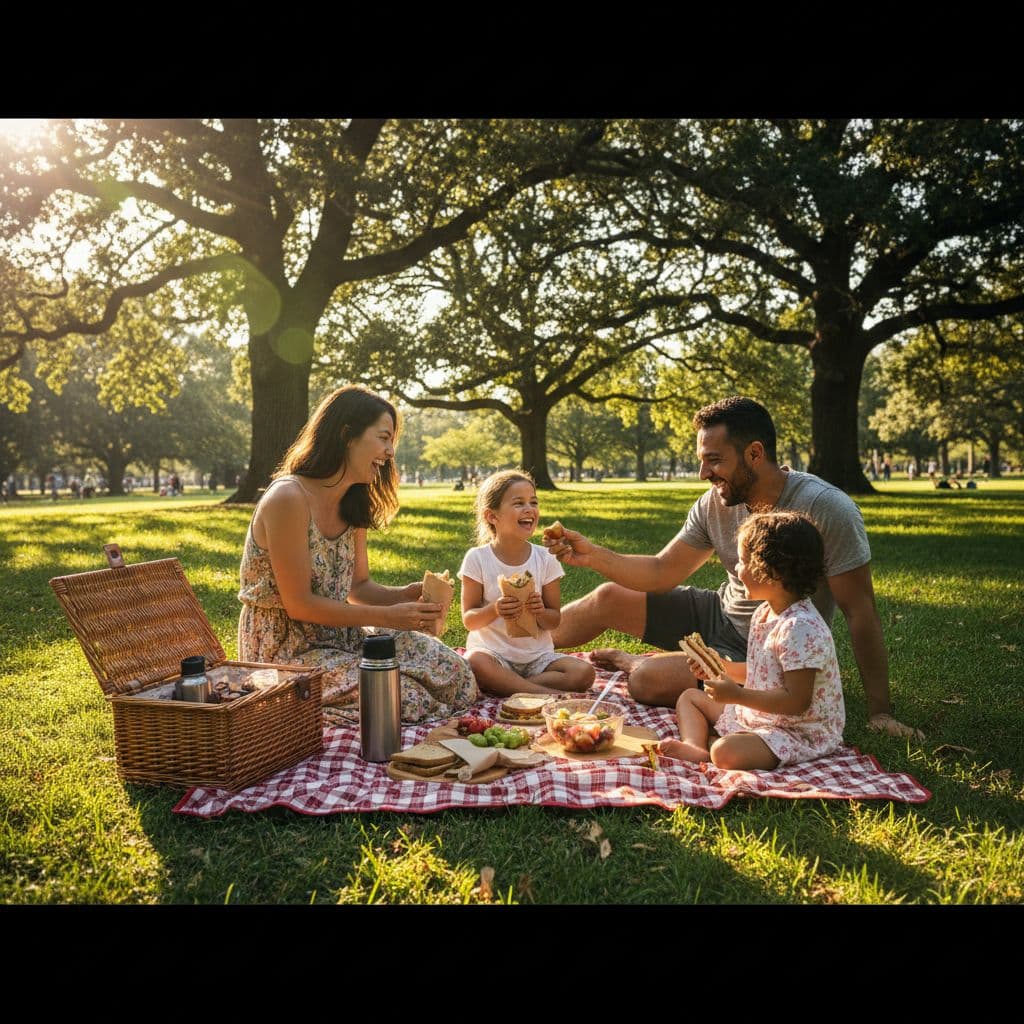
Keep the trip safe, affordable, and realistic
A good eco-educational trip should feel calm, not costly or chaotic. When you keep the plan practical, you give children more room to notice, ask, and learn.
That means choosing places you can reach easily, building in comfort stops, and setting expectations that suit the group. It also means treating the budget and safety plan as part of the lesson, because responsible travel starts long before you arrive.
Set a budget without losing the learning
You do not need an expensive attraction to create a rich experience. Local sites often teach just as well, and they are far easier on your wallet.
Start by looking at nearby parks, free nature reserves, community gardens, woodlands, or walking trails. A picnic lunch, public transport, and borrowed equipment can trim costs fast without cutting the value of the day.
A few simple money-saving choices go a long way:
- Use local sites so you avoid long travel and high entry fees.
- Choose free nature reserves or public green spaces where children can explore safely.
- Pack picnic lunches instead of buying meals on site.
- Travel off-peak to avoid crowds and sometimes lower prices.
- Borrow equipment such as binoculars, field guides, or magnifiers from school, friends, or local groups.
If you are planning a school trip, some places also offer free or low-cost visits for groups. A short check of nearby options can reveal more than you expect, especially when you focus on simple, hands-on learning rather than major attractions. For more budget-friendly ideas, ways for families to spend time outdoors on a budget is a useful starting point.
The cheapest trip is often the one that stays close to home and makes the most of what is already there.
You can also save money by choosing one clear learning goal. When the day has focus, you spend less on extras and give children a stronger takeaway.
Check access, toilets, and route difficulty
Practical details matter more than you think. A route that looks easy on a map can feel long, steep, muddy, or tiring once you are there.
That is especially important if you are travelling with younger children, wheelchair users, older relatives, or mixed-ability groups. You need paths that match the people who are coming, not just the destination on paper.
Before you book, check these points:
- Access: Look for step-free routes, wide paths, and clear entrances.
- Toilets: Check how far they are from the main activity area, and whether they are open all day.
- Route difficulty: Ask about hills, stiles, gravel, mud, or long distances between stops.
- Rest spots: Benches, picnic tables, and sheltered areas make a big difference.
- Parking and drop-off: Simple arrival and departure points reduce stress for everyone.
If you are unsure, contact the site and ask direct questions. Good venues will tell you whether buggies, wheelchairs, or short legs can manage the route comfortably.
A flat woodland path may work better than a dramatic hillside trail. A small reserve with good access can be more educational than a bigger site that leaves half your group behind. Which? also notes that planning ahead can save both time and money on days out.
Prepare for weather and simple risks
Weather can change a trip fast, so keep your plan flexible. Layers, waterproofs, hats, and sturdy shoes are small details that stop minor problems turning into major ones.
You should also have a backup plan. If the ground is too wet, the wind is too strong, or the heat is too much, switch to a shorter route, a sheltered activity, or an indoor stop nearby.
A calm safety plan should cover the basics:
- Check the forecast the day before and again on the morning of travel.
- Share emergency contact details with every adult in the group.
- Carry any needed medicine, plus a small first-aid kit.
- Set clear supervision points, especially near water, roads, or livestock.
- Tell children what to do if they get separated from the group.
The aim is not to worry people. It is to keep everyone steady, safe, and able to enjoy the day. A sensible plan also helps children see that care for people is part of care for nature.
For school groups, the U.S. National Park Service field trip tips give a good example of how simple preparation supports a smoother visit. The same idea works for family outings too.
When you balance cost, comfort, and safety, the trip feels realistic for everyone involved. That is where the best learning happens, because children can relax, notice more, and enjoy the place without distraction. What part of this eco-educational idea would you try first?
Make the learning stick after the trip ends
The best eco-educational trips do not finish when you get back through the front door. You can keep the learning alive by helping children talk about what they saw, name what mattered, and connect the day to ordinary life. That way, the trip becomes part of their habits, not just a nice memory.
A little follow-up goes a long way here. When you give children space to reflect and act, they remember more, notice more next time, and start to see nature as something they can care for every day.
Use reflection to deepen understanding
Simple reflection prompts help children sort the day in their own words. Keep the questions short and concrete, then give them time to answer without rushing.
Good prompts include:
- What surprised you? This helps children notice what stood out most.
- What did you notice? Use this to bring their attention back to details.
- What would you do differently next time? That turns the trip into practical learning.
- What was your favourite moment? This keeps the tone warm and easy.
- What question do you still have? That opens the door to more learning later.
You can use these prompts at the end of the trip, in the car, or the next day at home or in class. Some children like to draw, while others prefer speaking first and writing later. A short nature journal page works well too, especially if they add a sketch, a colour, or a quick sentence.
If you want a simple model, the Rose, Bud, Thorn method also works well. Ask children to share one best part, one thing they want to learn more about, and one challenge they faced. It keeps reflection light, but still meaningful. For more ideas, simple reflection activities for kids after outdoor trips offers a useful set of prompts you can adapt for different ages.
Short reflection beats long discussion. If the prompt is clear, the memory stays sharper.
Turn one trip into wider action
A good trip can shape what happens next at home, at school, and even in the wider community. You do not need a huge project to make that happen. Small, age-friendly actions are often the ones children stick with.
You could turn a woodland visit into a family habit of noticing trees on local walks. A beach trip might lead to a weekly litter pick, even if it only takes ten minutes. After a farm visit, children may start asking where food comes from and wasting less at lunch.
In school, you can build on the trip with a display, a short presentation, or a class wall of questions and drawings. At home, families can use the same theme for weekend walks, birdwatching, composting, or growing herbs in pots. These links help children see that sustainability is not a one-off topic, it is part of everyday choices.
A simple next-step plan can look like this:
- Pick one thing to keep noticing, such as birds, insects, waste, or plants.
- Choose one habit to repeat, like using reusable bottles or packing litter-free lunches.
- Share one action with others, such as a class poster, a family photo journal, or a small clean-up.
That approach also fits the wider ecotourism message. Responsible travel works best when it supports conservation and local communities, and when it changes how you move through the world afterwards. If you want more ideas for keeping trips low-impact, practical sustainable travel tips can help you build the next outing with the same mindset.
A trip that leads to one new habit has already done its job. A trip that leads to a family routine or a class project has done even more. What part of this eco-educational idea would you try first?
FAQ: Your most common eco-educational trip questions
When you start planning eco-educational trips, the same questions come up again and again. That is a good sign, because it means you are thinking about comfort, learning, cost, and the experience itself. The answers are usually simpler than people expect, and a small, well-planned trip often works best.
What is the best first eco-educational trip for beginners?
Start close to home. A local nature reserve, wildlife park, farm, or coastal walk gives you an easy first step without too much pressure.
That matters because beginners do better when the setting feels familiar. Children can focus on what they see, hear, and touch, rather than coping with a long journey or a packed schedule. A short visit also gives you room to test what works before you plan something bigger.
A farm visit is a great choice if you want clear links to food, seasons, and animals. A coastal walk works well if you want to talk about tides, birds, and litter. For a gentler day, a reserve or park gives you space to slow down and observe.
The best first trip keeps the learning light and the pace steady. If you want a simple model, family farm adventures show how hands-on outdoor learning can feel relaxed, practical, and memorable.
How do you keep children interested all day?
Mix the day up. Children stay engaged when they move, look, talk, and play in short bursts.
Long talks tend to lose them, but short tasks keep their attention fresh. You can use scavenger hunts, sensory games, sketching, bird spotting, or leaf and bark observations. Then add time for snacks and movement so the day never feels heavy.
A simple rhythm works well:
- Start with a quick welcome task.
- Follow with a short walk or lookout activity.
- Pause for a snack and water break.
- Switch to a game, question, or drawing task.
- End with a shared chat about what they found.
Variety is the key. If one child wants to count birds while another prefers drawing tracks, both can still join the same trip. For more child-friendly ideas, nature-based tips for kids give you useful ways to keep outdoor learning lively.
Can you plan an eco-educational trip on a tight budget?
Yes, and it often works better that way. Free or low-cost places can give you a richer experience than a pricey attraction if the visit has a clear purpose.
Local parks, beaches, woodland trails, community gardens, and public nature reserves often cost little or nothing. You can also cut costs by sharing transport, packing picnics, and borrowing binoculars, magnifiers, or field guides instead of buying everything new.
A budget-friendly trip still feels special when you choose one strong learning goal. A short walk with a good question can teach more than an expensive day with too many extras. You also help children see that eco-friendly travel is about choices, not spending.
To keep costs down without losing value, try this:
- Use a free site close to home.
- Bring your own food and refillable bottles.
- Share lifts or use public transport.
- Borrow learning kit from school or a local group.
- Keep the visit short, focused, and well planned.
A tight budget does not have to mean a thin experience. It usually means you have to be more thoughtful, and that often improves the trip.
What makes a trip educational rather than just scenic?
A scenic trip becomes educational when you give it a learning goal. Without that, children may enjoy the view, but they may not understand why it matters.
You need four things. First, a clear focus, such as habitats, food systems, wildlife, or waste. Next, guided observation, so children know what to look for. Then reflection, so they can think about what they noticed. Finally, a takeaway or action, so the lesson continues after the visit.
For example, a beach walk becomes educational when children look for signs of tide movement, compare different kinds of litter, and talk about how pollution reaches the sea. A forest visit becomes educational when they spot layers of life, listen for birds, and record changes in the ground, plants, and light.
If you want the day to count, make the children notice, think, and do something with what they learned.
That final step matters most. It might be a class poster, a home discussion, a sketchbook page, or a small habit change. When the trip ends with action, the learning tends to stay.
Conclusion
An eco-educational trip works best when you keep it simple, local, and purposeful. You do not need a big budget or a faraway destination to give children a day that builds curiosity, respect for nature, and real-world understanding.
When you choose one clear theme, plan for the group, and keep the visit low-impact, you turn a normal outing into something memorable. Families and teachers both gain more when the trip mixes learning, responsibility, and time outdoors.
Start small, trust the process, and let the place do the teaching. What part of this eco-educational idea would you try first?